Wednesday, February 27, 2013

Dutch Glossybox Febuary 2013


Glossybox is a term that over the last two years has exploded in beauty land. The concept is very straight forward; You pay €14.95 (incl. shipping) for a one month subscription, which is a single box. There are also other subscriptions for 3 months, 6 months or 12 months. The box contains 5 travelsized products (usually at least 1 fullsized one) which in value will always exceed the cost of the box. It's an amazing way of trying out new products and it's a nice little surprise for yourself at the end of the month! For more information about the concept, check the Glossybox website.


Anyway, after that short explanation let us move on to the actual box! This months Glossybox (The Dutch one) was themed "Go inside the Beautylab!" which was packed with experimental products, which I found nice. Beautyproducts wouldn't be where they are today without science, so I like the mix of the two in this box!

The box came with a coupon for a free Albelli photobook worth €13.95, you'd still have to pay shipping.
A €5 coupon for the online shop of Dr. Van der Hoog if you spend more than €15 and a new edition of GLOSSYmag, the mini Glossybox magazine.


Indola Wonder Treatment, 100 ml fullsize product (€14.95)
This is basically just a very fancy leave in conditioner. It's a two phase product which needs a good shake before use. It promises the following on the bottle:

  • Instant shine and smoothness
  • Incredible detangling
  • Repair and nourishment
  • Revitalised bounce and vitality
  • UV & colour protection formula
  • Static and frizz control
  • Reduced split ends
  • Easy blow dry
  • Active moisture balance
  • Feather-light formula
So it promises a whole lot, some of which is just hot air, really. If you're just looking for a light formula leave in conditioner it's good, especially with hair like mine which gets oily easily, but it is by no means a wonder product. It does reduce frizz and adds some shine, but not in the amount you'd expect from reading the packaging. The scent is a very sweet, almost heavy, vanilla which luckily doesn't linger. I don't appreciate this kind of scents in my products, especially hair products as it then wafts into your face all the time.


Biotherm Biomains, 20 ml sample. (100 ml retails for €25, so this tube is about €5 worth of product.)
A very rich hand and nail cream, which dries fairly quickly on the skin and gives instant relief from dryness and itching. If it wasn't for the steep price-tag  this would probably become a go-to product for me. The size of the tube means it went straight into my handbag, and will be staying there over the coming weekend as I will be travelling and air-co on planes always messes up my skin.


Mario Badescu Silver Powder,14 ml sample. (29 ml retails for €14 so this jar is €7 worth of product.)
This is one of those freaky science-y products that you always read about on other blogs and really want to try out, but don't wanna pay the cash for something you might not use. It promises to fight stubborn blackheads and visible pores. I don't know to what extent it did this, but my skin was looking better after use on my T-zone, more matte and such. Sort of on the fence about this, need to test it some more!


Dr. Van der Hoog Hydro Active Mask, 50 ml fullsize (€9.10)
A hydrating, exfoliating and regenerating mask. This brand is very popular in the Netherlands and I am personally a big fan of all their masks. This packaging is great, it comes with an application brush which you can clean just using warm water after you've turned the head to avoid getting water in your product. The product itself is a thin, milky white gel which feels cooling on the skin. I use this on my cheeks and the sides of my forehead as these get very dry in the winter months. It left my skin feeling hydrated and looking radiant. I say it's a keeper!


Bell "Air Flow Lotus Effect" Nail Polish 703,  10 g fullsize (€3.50)
This polish promises strong staying power thanks to a high concentration of polymer. The label also claims that the polish lets air through to the nail and that the polish therefore would be less damaging. I wore this polish for 15 hours without a topcoat until I noticed the first tip wear. at 36 hours it had already chipped, so I don't know about that staying power or the "air flow". Can't stay I'm impressed. The colour is a light, pastel lavender which is cute for spring and all, but the formula leaves a few things to be desired. After 3 coats it still looked patchy, took forever to dry without a fast drying topcoat and wasn't very shiny on it's own. Nope, this hyped up product won't become a staple in my polish stash.


Yours truly wearing the mask in my cheeks and the silver powder on my T-zone!

All in all, a good €15 spent! I love the concept of the Glossybox and it would also make for a great present for any beautyaddicts in your life!

Have you tried Glossybox yet or any other Beauty Box? Do you want to? Have an opinion on the products that I tested in this months box? Let me know in the comments below!

Thank you for reading!

xxx

Monday, February 18, 2013

Brush-maintenance: Take care of your tools!

To me brushes are very important tools to the perfect look, that perfectly blended crease and flawless foundation. I can't imagine ever having to do my make-up without them, so I bring them whenever I travel with my make-up. Most of my brushes are from Sigma, one is MAC(217) and a few are from Coastal Scents. Investing in brushes is one of the first things I'd advise people to do when first getting into make-up, it makes it so much easier and helps you get the right look.

Anywhoozle, let's get down to business! Brushes, whether they are made of real or synthetic hair, need to be washed. To clean them, to get all the gunk, dirt and makeup out of them, and to care for the hairs. This is my number one beauty sin. I don't do this often enough, although I ought to do this once a week, but I don't. In this post I will show you how I clean, care for and store my brushes!


I've recently gotten brushguards for all my brushes. A brushguard is a mesh tube that is available in many sizes to fit your brushes. You slip the brushguard over the brushhairs and it keeps the brush from splaying and keeps it in a nice shape. This is perfect for travelling, as it will keep your brushes in great condition.


When I wash my brushes, I bring them to the kitchen and lay them out on the counter. In this picture I have the brushguard on the handle, so I just have to slip it down over the brush when I set them out to dry!


To wash my brushes, I wet the brush hairs by holding the brush under a running fawcett. I just use cold water, no need to waste hot water on that! When holding the brush under the water I make sure not to go above the ferrule (the metal bit that keeps the hairs in place). Getting water in that can break down the glue keeping the ferrule and the hairs in place. And we sure don't want that to happen! I also work the brush lightly over my hand under the water, to make sure the water gets through to all the hairs and that everything is wet.


When washing them I use a small plastic cup, this one is just a measuring cup. I put in a dollop of shampoo, any shampoo works, but I use baby-shampoo to be as gentle as possible on the hairs. I just get the cheapest stuff at the drugstore baby section.


When washing a round brush, as in the photo above, I swirl the wet brush in the shampoo for a few seconds. In this case I am cleaning a powder brush, so it doesn't give off a lot of colour, but I generally find a few seconds enough. I then rinse the brush under the running fawcett and again, be sure not to get any in the ferrule. I keep rinsing it untill the water coming off the hairs is completely clean.


Sigma Powderbrush.
Sigma Large Eyeshadow Blending Brush.
Then I blot the brush on an old towel and to avoid my brushes drying in the splayed form you see above, I let them dry in their brushguards.


While drying I put the brushes upside down, with their brushguards on, in an old pencil holder. I find these optimal due to the mesh as it lets through a lot of air and hopefully helps the brushes dry faster. Since they are metal, I line the bottom with a tissue, just to be sure.


I let them dry upside down to let all the water run away from the ferrule, and let them lean on the brushguards. I do feel the brushguards make drying time longer, but I find it very worth it when you consider how well they protect the brushes.


A good 10-12 hours later and my brushes are all dry and back in their place. All have dried in perfect shape and will last me many years because of how I care for them.


My brushholder is one I found for very little money at the local drugstore. I keep facebrushes in the big compartment, eyeshadow ones in the medium one and the small one is now dedicated to brushguards. Before I got my brushguards, the small compartment was the home of my eyeliners.


How do you care for your brushes? How do you store them? Got any tips? Let me know! Share the love!

Thank you for reading and untill next time!
xxx

Wednesday, February 6, 2013

Review and swatches: Rimmel Apocalips Lip Lacquers!

L-R: Big Bang, Celestial, Apocaliptic
These are the bees knees when it comes to beauty-news at the moment, everyone is raving about them. And honestly? I can't blame them, these are amazing! I've gotten three colours and I've hugely enjoyed playing with them.

Let's start on the outside, the packaging. It looks like a regular lip-gloss tube, but I do like the black that fades to transparent. It looks nice and higher end than what Rimmel is, let's be honest. We all know their purple lipstick tubes, which do look awesome.. When you're 15. The black fades to transparent at the bottem where you can see the colour of the Lip Lacquer, which I personally find very handy, no fiddling around with packaging. The silver print gives it a bit of an edge, which I also sort of like. It's mature enough, without looking boring then. I'm a fan of this!

L-R: Big Bang, Celestial, Apocaliptic

The Lip Lacquers come with a doe-foot applicator (as all lipglosses do) but this one has a small dent in the center, which means that you get the perfect amount of product when applying these. As you extract the applicator, there's a dispenser at the opening of the tube, making sure you don't get out too much product. It all seems very thought through, and also makes this a good handbag/on-the-go product. You get the right amount, every time.

The formula.. Oh don't even get me started on this piece of magic. It's a liquid lipstick, but thin as a lipgloss, without the stickyness. They are packed with pigment and one single layer is enough. They apply shiny, but dry to a sort of satin finish, which is where they get their staying power. After a few hours it does feel slightly dry, but a small re-application fixes that right up. They won't last a 5 course meal, but easily through a work-day, a night out or a party. They don't have much of a scent, just slightly floral/perfumey.

The colours that I got are Big Bang, Celestial and Apocaliptic. A bright red, a neutral pink and a full-on darkened fuschia.

On to the swatches!

L-R: Big Bang, Celestial, Apocalips

Big Bang

Big Bang on my lips
Big Band is a classic, orange/warm red. It applies easily and I might end up liking the doe-foot application over the old-school lipstick and brush method. It works very precisely which is a MUST for bright lips and especially reds. It's a beautiful colour, but I think it's the formular that makes it special. It's a pretty common red that will work on most skin-tones.

Celestial
Celestial on my lips

It's a lovely neutral pink, a sort of safe bet I guess. It's not nude, by a long-shot, but it is perfect for most looks that require a little more than just a nude colour. It's very suited for work/school and might very well make its way into my "everyday" stash. It's a type of colour that will work well for light to medium skin.

Apocaliptic

Apocaliptic on my lips
And now on to the gem of the collection: Apocaliptic. This bright, darkened fuschia is what Kate Moss wears in the promos for this line and it is breath-taking. I can assure you that this is what I'll be wearing through spring and summer. It's a beautiful bright colour that will go with any skin-tone, I believe, IF you're up for wearing something this outspoken. I personally love a bright lip.

The Rimmel Apocalips Lip Lacquers are sold in any drugstore that carries Rimmel and cost €10.99 in Holland. Personally I find the pricepoint fairly high for the brand (considering they are only £5.99 in England), but I feel they are worth every cent.


Pros:

  • Great, practical packaging.
  • Paying €10.99 for this quality isn't too much, I think, considering the prices some pay for worse, high end products.
  • Availability, pretty much all drugstores carry Rimmel throughout Europe.
  • The applicator works very precisely and is very easy to use.
  • Great pigmentation.
  • Stays on for a long time.


Cons:

  • Can feel drying during the day.
  • Smudges slightly and does come off on cups, etc.


Conclusion:
I love these and can promise that I will be wearing them a lot in the coming months.As I said in my last review; I am very impressed with how the drugstore brands are kicking up their game. In the past few years, it has become easier and easier to find good, high quality products in the drugstore and these Lip Lacqers sure bring their A-game. So if you're in need (let's face it, we always are, right ladies?) of a new lip colour, go to your local drugstore and check these out. There's something there for pretty much everybody.


Have you tried these out yet? Let me know what you think!

Thank for you reading and untill next time!

XOXOXO

Tuesday, February 5, 2013

Favourites of the moment!


Time for another favourites post! These are products I've been loving throughout this winter, and seeing as my skin does go drier in the cold months, that has an effect on the products I use and wear. My skin and my lips in particular get paperdry, so a girl's got to make some changes, right? On to the products!

As for face products I've been loving some new stuff. Some are new, some I've had for a while so let's get to  it!

First up MAC Cosmetics Prep+Prime Skin Base. It's a great, basic primer for normal/dry skin. It leaves a slightly luminescent finish on the skin and makes your makeup stay on and look good for a couple of more hours than it normally would. In the warmer months, when my skin gets oily, I can't use this product as it will make my face look like a greaseball in a matter of hours, but for the state my skin is currently in, it's perfect!
It's a pump bottle which is both handy and hygienic. The bottle contains 30ml of product and costs €24.00. It is sold at all MAC Counters and ofcourse via the MAC online store.

I've been enjoying using an illuminating primer for certain spots, like cheekbones and my nose, for that "undetectable" glow. For this I use the Essence My Base Illuminating Make-Up Base. It's a pink toned iridescent primer, which just adds that little bit of glow under the foundation, making the look very natural and slightly dewy. This is also a pump action packaging, but in a tube. Very handy! It contains 20ml of product and costs €3.79 and is sold at Kruidvat. (Dutch drugstore.)

For my foundation I've recently discovered the Max Factor Facefinity All Day Flawless 3in1 Foundation. My colour is 47 Nude. The foundation promises a whole lot, but all I can say is that the coverage is great, it lasts a long time and stays semi-matte on my skin. It's not a completely matte finish, it's more of a "velvety" finish, which is beautiful. The foundation is very liquidy but has a lot of pigment in it, meaning you don't need a lot for good coverage. Which is turn means you easily avoid looking cakey with this product. There's a good shade selection of these, even one a tone lighter than my one for the VERY fair ladies out there. The bottle contains 30 ml of product and costs €14.99. It's sold at all drugstores in Holland.


The face-powder I've been loving is the MAC Cosmetics Studio Fix  Powder Plus Foundation in NC 20. I know it's says "powder foundation" but I only use a light dusting of it to set my foundation and for that extra bit of coverage. It keeps my T-zone matte and if applied lightly, looks very natural. It contains 15 gr of product and costs €30.00. It's sold at all MAC Counters and ofcourse via the MAC online store.

I have lately discovered a new blush (palette) that I've been loving. It's the Sleek Make-Up BlushBy3 in "Lace". It has three colours in it and you can read and in depth review of it here. The palette contains 20 gr of product and costs €12.95. It's available from many webshops, I got mine here. It's a Dutch webshop, but Sleek is also just available through the company's own site. They ship internationally.

I've also rekindled my love for the jewel of my collection: Dior Shimmer Powder in 001 Rose Diamond. It's a light, champagne pink highlighter which gives a gorgeous, suble glow. It's just beautiful. I can sit and stare at the packaging and the product forever. It contains 10gr of product and costs €42.99 This product is available at high-end beauty stores and Dior counters.


On to the eyes! I've been keeping it simple over the winter, but here are my picks!


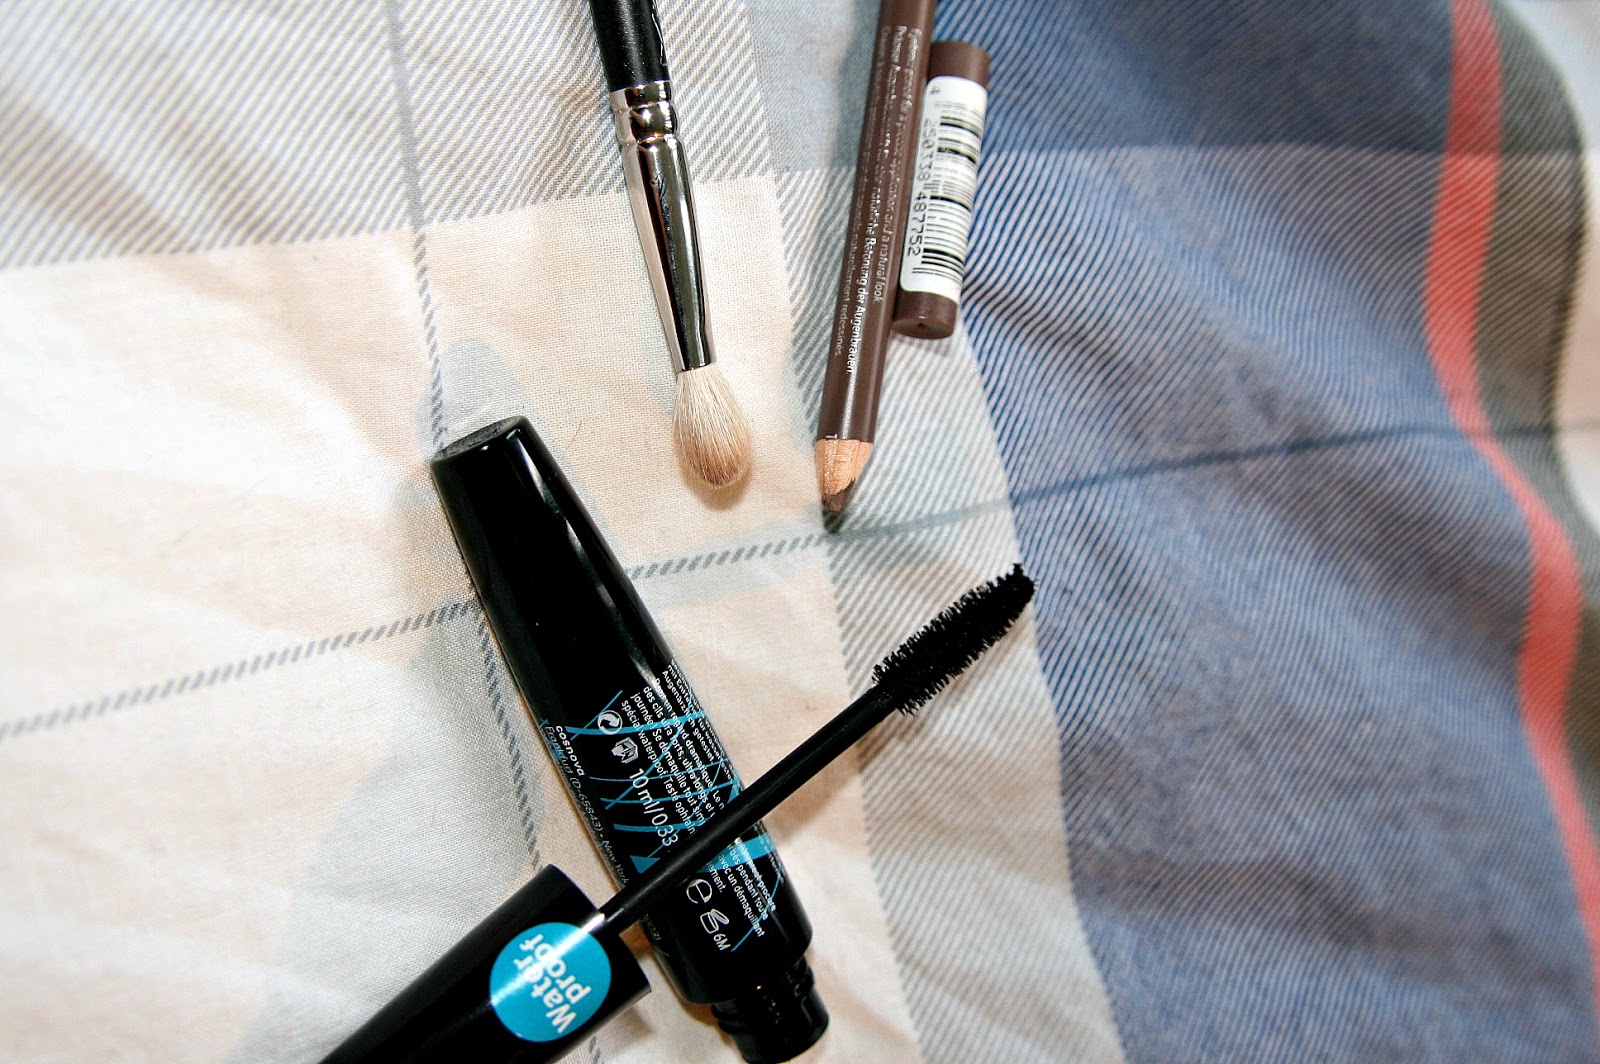
We'll start off small. I thought it was about time one of my favourite tools got it's time in the spotlight. I firmly believe that your make-up application is only as good as the tools you use. A good brush makes a world of difference and when it comes to eyemake-up there is one brush I can't live without and it's my MAC 217. It's a very soft, very dense, slightly domed crease/blending brush. I've not always had this brush, but since I do, I have no idea how I ever lived without it. If I was ever only allowed to have one brush, this would be it. I also have the Sigma dupe of this brush, but I do still prefer the MAC one. The MAC 217 costs €22.00 and is sold at MAC Counters and of course in their online store.

Next there's the Catrice Eye Brow Stylist in 020 Date With Ashton. I've recently gone back to brown hair, so had to change up my brows. This pencil is an ashy-brown, so very neutral. On top of it I use a warm brown to get the perfect reddish tone that suits the shade of brown I have dyed my hair. The pencil has a very waxy feel to it, which helps it stay in place better. It costs €2.49 and is sold at Kruidvat.

Recently I've fallen in love with a new mascara, a very budget proof one too! The Catrice Lashes to Kill Waterproof Volume Mascara is to me a perfect dupe of my longtime favourite, Maybelline One by One Waterproof. The mascara is very waterproof, doesn't smudge on me and is VERY clump-proof.  The wand has the classic synthetic bristles, which I do like better than the rubbery ones of the Maybelline. It's sold at Kruidvat and costs €3.99.


As eyeshadow goes, I've been keeping it simple. I've been using my Sleek Storm Palette loads and it's just a wonderful product. You can read my review on it here. The palette costs €9.95 and is available from several webshops and from the company's own site.

Beyond this palette I've been using the GOSH Effect Powder in Meringue. I found this in a sale box at Kruidvat for €2.50, which means it's no longer sold, in Holland at least. It's a beautiful shimmery pink/silver that looks almost wet on the eyelid, I love it. The down-side to working with loose powder eyeshadows is fallout, but this can be helped by tapping excess off your brush before applying it to the lid. I find that this stays well on my lid during the day. Usually shimmery/glittery eyeshadows tend to drop down under the eye during the day, but if packed on properly with a flat brush that has been tapped free of excess powder before application, this really stays in it's place. In Holland GOSH is only sold at Kruidvat.


Onto lip favourites!


To take care of my dry lips in the cold weather, I've been using my trusty Elizabeth Arden 8 Hour Cream. This little miracle cream works wonders on any dry, cracked, patchy, chapped skin/lips. I love this product and I never want to live without it. It contains Salicylic Acid which also makes it a chemical exfoliant, so I never have to physically scrub my lips. No dry, cracked winter-lippies here! My tube is a small travel size that I bought at Kruidvat for €4.99 but they don't normally carry the brand. It can otherwise be found at high-end beauty stores.

As far as lip-colour goes, I've been keeping it pretty neutral. First up is MAC Creemsheen Lipstick in Creme Cup. It is a neutral/cool toned light pink with a very moisturizing formular. On my pigmented lips it does look a little warmer than on less pigmented lips. The colour is a perfect neutral lipcolour, goes with anything and is perfect for work/school. MAC lipsticks are €18.50 and for sale at MAC Counters and the MAC online store.

Next up the a L'Oreal Caresse Lipstick in the colour 401 Rebel Red. This is a sheer, warm toned red. They call it a lipstick, but it is really a tinted lipbalm. It's very sheer, very shiny, moisturizing and perfect for a bit of colour without wearing a full-on red lip. Perfect for people who might not quite dare the bright red, like MAC Russian Red or similar. It costs €14.99 and is sold in all drugstores.

L'Oreal Caresse Rebel Red - MAC Creme Cup
Lastly a couple of other beauty related favourites!


We'll start with my true love out of these 4. Chanel Coco Mademoiselle Eau de Toilette. I'm horrible at describing scents, so I won't even try. This is just divine and I'm unfortunately running out. This is pretty much my signature scent, I love it. It's fresh, but not juvenile. This bottle contains 50 ml of perfume and costs €69.00 and is available at any high-en beauty store that carries Chanel scents.

In winter, as I've said a few times now, my skin dries out. Not just on my face, but all over and especially my  hands. To try and prevent that from happening my husband bought me the OPI Avoplex High-Intensity Hand & Nail Cream. It's been wonderful to not have dry, itchy, painful hands the entire season, this cream really is amazing. It sinks into the skin right away, moisturizes instantly and to top it off, it has a wonderful citrusy scent. The tube contains 50 ml and costs €12.95. Available at stores with a larger OPI Display.

To keep on the trail of the dry skin, Rexona Cotton Ultra Dry Anti-Perspirant Anti-Tranpirant Dry Deo Stick 0% Alcohol 48H. Whoa, what a name! But basically, it's a deodorant stick that you twist up and it's a firm, cry cream you apply. It keeps my skin moisturized, dry and avoids smelliness. (This is a tad awkward, but hey we're being honest with eachother here, right?) This costs €4.99 and is available in drugstores.

Lastly we have a hairproduct! I am not a wiz of any kind when it comes to hair, I am actually really bad at it. And it doesn't help that my hair is as thin as my thumb when gathered in a pony-tail. So to add some texture and volume I've been using this Mop C-System Texture Spray. It's basically a salt-water spray with a fancy scent, but I like the messy effect it gives. I spray this on my roots and let it airdry (because I am lazy and can hardly ever be bothered to pick up my blow-drier). It just provides me with texture and body that my sleek, straight, thin hair does not naturally have. I can't find a price anywhere of this, as it seems to be discontinued.


And that's all folks! Thank you for reading, feel free to leave a comment telling me about your favourites or something you think I should try out.

Monday, February 4, 2013

Tutorial: Soft shimmery eye and neutral pink lips!

Time for another tutorial! I was heading out for an afternoon birthday-gathering and decided to do a tutorial on the look I was wearing.

As always I start with a moisturized and primed face. As my all-over face primer I used the MAC Comestics  Prep+Prime Skin Base and locally (on my cheekbones, forehead and chin) I used the Essence My Base illuminating make-up base. On my eyelids I used my Too Face Shadow Insurance, as always, and on my lips I used a thin layer of Elizabeth Arden 8 Hour cream.


I then applied my foundation and concealer using a damp Beauty Blender sponge. As foundation I used a 50/50 mix of Estee Lauder Double Wear in the colour Shell 15 and Max Factor Facefinity All Day Flawless 3in1 Foundation in the colour Nude 47. I applied oncealer under my eyes, around my nostils and under my eyebrows. For eyes and nostrils I used the Maybelline Super Stay Concealer in the colour Light 2. Under my eyebrows I used MAC Cosmetics Studio Sculpt Concealer in NW15. I always conceal under my eyebrows, it works as a subtle highlight and also helps define the brow.


Next I used my Catrice Eyebrow Stylist in 020 Date with Ashton and ontop of that I used Urban Decays "Buck" eyeshadow (from my Naked Pallette) with a fine angled brush to define the brow and set the pencil. To make sure everything stayed in place all day I used my Hema Eyebrow Gel in Brown. To highlight the brow and set the concealer I used under the brow I used Catrice Absolutely Eye Colour Mono in 090 Bring Me Frosted Cake.


To define my crease I first used the matte light-brown from the Sleek Storm pallette with a soft crease brush (MAC 217 Dupe from Sigma) and blended this lightly over my entire crease area. For soft definiton I used the same brush to apply the darker brown colour from the same pallette in the outer corner and crease.


On the eyelid I used GOSH Effect Powder in Meringue, which is a beautiful shimmering pink colour. I applied this with a flat, firm paddle-brush and patted it onto the lid. If you were to apply a powder like this with a swiping motion, more of it would end up under your eye than on it. Patting it on insures that the pigment and the shimmer stays put.


Again for soft defition I used an angled liner brush with the matte black from the Sleek Storm pallette as an eyeliner and applied along my upper lashline while slightly brushing up. This blends the liner and gives a much softer look than gel or liquid liner. I made a small flick at the end, to optically lift my eyes a little, I always do this with liner, but never a full wing since it doesn't work on my hooded lids. On my waterline I used MAC Chromographic Pencil in NC15/NW20. This again just helps opening up your eyes.


Lash curling and mascara time! I was thankfully blessed with fairly long lashes, they are just very straight so I always, always, always curl them. It just opens your eyes up and looks (in my opinion) a lot better. To make sure the curl stays in I use waterproof mascara.

My lash curler is from Tweezerman and the mascara I used is Catrice Lashes to Kill Waterproof Volume Mascara. It's a great formula and in my book a very good, and much cheaper, dupe for Maybellines One by One.

Time for one of my favourite steps in makeup: blush and bronzer! My bronzer is from the Body Shop, it's the Honey Bronze Bronzing Powder in the shade 02. It's a brilliant bronzer for fair skin, without being TOO orange as long as you use a light hand with it. I apply this under my cheekbones, on my temples, along the hairline and jawline with a Sigma Tapered Face brush. It blends wonderfully into the skin. For blush I used NYX Blush om 03 Angel. It's a shimmery pink, again perfect for fair skin, but probably won't show up much on medium or dark skintones. I applied this to my cheeks with a Duo Fiber Stippling Brush.


For blush I used NYX Blush om 03 Angel. It's a shimmery pink, again perfect for fair skin, but probably won't show up much on medium or dark skintones. I applied this to my cheeks with a Duo Fiber Stippling Brush.


As a highlighter I used the gem of my collection this far, the Dior Shimmer Powder in 001 Rose Diamond. It's a beautiful champagne pink, with subtle shimmer and is again perfect for very fair skin. For slightl darker ladies they have a version called Amber Diamon which is a warm, gold toned highlighter. Also gorgeous!

As a lipliner I used my Catrice Precision Lipliner in 030 Lost in the Rose Wood. I applied this on on the contours of my lips and blended it with my finger for a more natural definition.


As for lipstick I used my MAC Cosmetics Cremesheen Lipstick in Creme Cup. It's a cool-toned rosey pink. Very pretty and very neutral, so also work-appropriate!

I topped everything off with a light dusting of MAC Cosmetics Studio Fix Powder Foundation in the colour NC20.

And here's the final result:


An overall very soft, and I think, pretty look.

Feel free to click the pictures for larger, high defintion photos. I tried something new with making the small collages, but they do need a clickity-click for a proper view of the make-up.

Thank you for reading and untill next time!