It's a very picture heavy tutorial but I didn't feel like sacrificing resolution on making collages, so I kept them in a smaller setting, but just click them big!
Let's get to it, then!

As usual here is my naked face. I'm only wearing the Smashbox Photofinish Primer and Too Faced Shadow Insurance.

As this would be makeup for a night out, I applied thicker layer than usual of foundation. I used my Max Factor Facefinity 3-in-1 foundation in the colours Light Ivory 40 and Nude 47. I blended this into my skin with a damp Beauty Blender sponge.


I then concealed all my problem areas with the Catrice Camouflage Cream in 010 Ivory. I first applied it where needed with my finger and then blended it in with my Beauty Blender. My "problem areas" are generally around my nose, under my eyes and my chin! Women have hormones that make the skin around our noses prone to turning red during the day, so I always conceal there!


For my eyebrows I used an angled liner brush and Urban Decays "Buck" from the Naked (1) Palette and my Hema Eyebrow Gel in Brown. If you want to make sure your eyebrows stay "on" all day, run a bit of eyeshadow primer through them before application and remember to use a setting gel. This works for any kind of brow-application, whether you prefer pencil, powder or both!


To make sure the colour of the eyeshadow is intense, I applied a dark base to my eyelids and blended it slightly with my finger. This can be either just a regular pencil eyeliner, a gel eyeliner or a product meant for these things, such as seen above. This is a NYX Jumbo Eye Pencil in the colour Dark Brown. These are very soft pencils, perfect to use as a base under eyeshadow, but in my experience cannot be worn on their own. If not worn with a base under them and a powder on top, they crease like mo-fos. But when used right, they can help you achieve just the look you're going for!
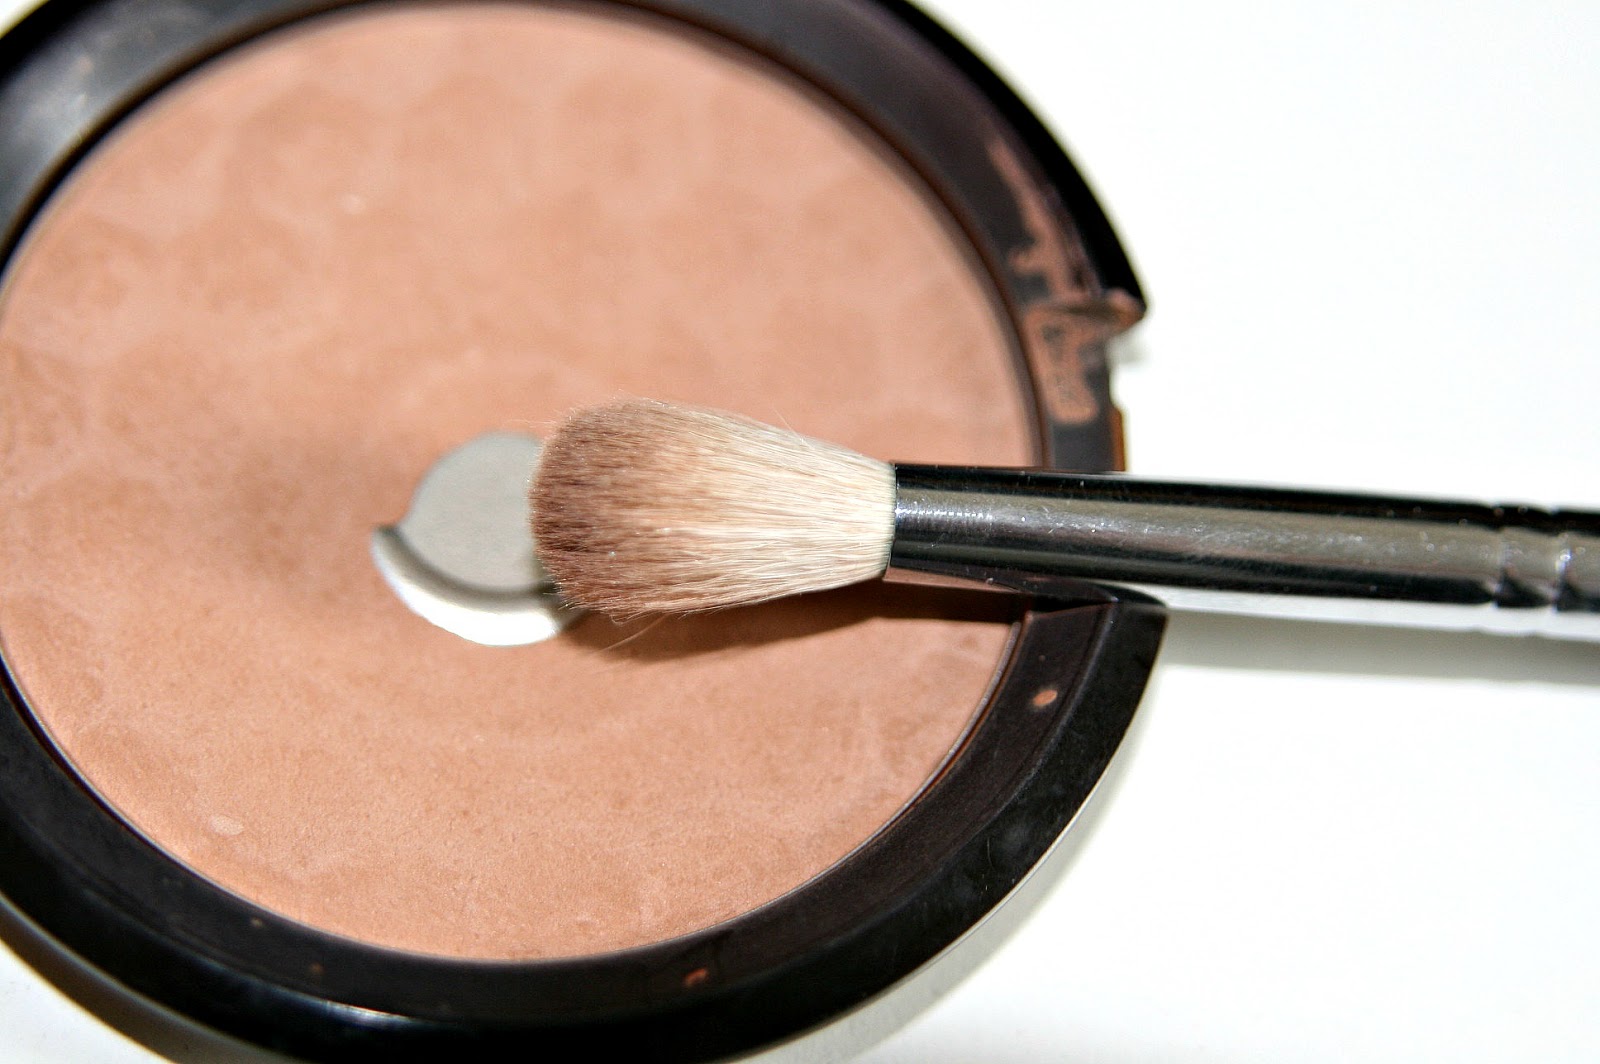


As a transitional colour in my crease, I used my Body Shop Honey Bronze Bronzer in shade 3. Applying this first really helps blend out the darker colour I'll be putting on the lid and also helping to blend in the dark Jumbo Pencil I've already got on the lid.


For my lid colour I used this dark golden-bronze by Inglot. I don't remember the number of this, but it's a stunning colour. The gold/warm tone of this eyeshadow also really helps bring out the blue in my eyes, which I like a lot! I patted this onto my eyelid using a flat shader brush by Sigma and blended it using a crease brush. The general trick to any smokey eye is: Apply and blend, apply and blend. Just do that untill you achieve the look you want, in between blending you may need to change brush or spotclean your brush. Eventually if the brush has too much shadow in it, it won't blend anymore, just move shadow around.

To make the look a little more intense I applied my Urban Decay Glide On Pencil in Demolition on the inner rims of the eye and also on my upper and lower lash line. I also used the dark bronze shadow on the lower lash line just to tie everything together.


Curl lashes and apply a generous coat of mascara! Dark smokey eyes have a tendency to almost swallow up lashes, so if doing this look when going out I'd definitely advise false lashes. If you're not a fan of falsies, just plenty of coats of a good mascara will do. I'm sure this is getting boring by now, but I used my Tweezerman Lash Curler and my Maybelline One by One Waterproof mascara.


To finish off the skin I applied Rimmels Stay Matte Powder in 003 Peach Glow. It's very matte powder, but I like a very matte skin when going out, especially if dancing is going to be involved! As the eyes are obviously the focus of this look, I kept the skin very simple and just applied my Honey Bronze Bronzer on the outside of my face: Along the hairline, under cheekbones and jawbone. It helps make my face look a little slimmer and also just brings a little colour into my skin. I obviously have a lot of redness in my face so with a look like this, I just totally skip blush. If you have completely even skin, a touch of neutral blush is definitely advised, to avoid "dead looking" skin.


To keep the lips simple and nude I used this Round Lipstick by NYX in the colour Circe. It's a warm beige-nude and the formula is creamy enough that it doesn't need a gloss on top.
And here's the full result!


Tadaaah, I'm ready for a night on the town!
What do you think of this look? What kind of makeup do you wear when going out? Let know in the comments below!
Thank you for reading and untill next time!
XXX


.JPG)

