Monday, April 8, 2013

Catrice Cocktail Review!

My favourite budget brand, Catrice, recently renewed their collection and I picked up some things that seemed interesting and now I want to share them with you!

I got three items from the new collection, their take on a BB cream, a new creamy concealer and eyeshadow primer. (The primer mainly because Sephora will be leaving Holland soon and I most likely won't be able to get my TFSI (Too Faced Shadow Insurance) anymore. BOO!) Anywho, let's get crackin'!


Catrice BB Allround Foundation Multi-Benefit Makeup, 010 Light Beige (€5.99). (Sheesh, what a moutful!)
BB Creams are all over the place at the moment and from what I gather from other blogs, most of them are flops, and do not compare to the real (asian) BB creams.


The packaging is really nice, looks and feels a lot higher-end than it really is. I like the fact that it comes in the box and that it's a tube. Tubes make for easier use and makes it easier to control the amount you get out of it. The tube is, as you see, an iridescent pink with metallic print on it. It looks VERY girly, and I have to admit I really like it!


My favourite part of the packaging is this tiny little nozzle, perfect for control of product, easy to keep clean and generally very hygienic. If only all budget-brands had this amazing packaging!

On the packaging 6 promises are listed:


  1. Balancing - hydrates the skin and reduces shine with oil-absorbing powder.
  2. Correcting - minimizes the visibility of pores, softens imperfections and hides all types of pigmentation and discolouration.
  3. Protecting - contains UV filters that protect the skin from UV rays.
  4. Illuminating - with illuminating pigments that guarantee a radiant glow and silky skin.
  5. Covering - conceals imperfections.
  6. Moisturizing - contains sweet almond oil that treats dry and sensitive skin.
Paraben free.

As you see, it's a lot of promises, and it got me curious as I have a lot of issues that need helping. I tend to have very dark undereye circles, I have redness through my cheeks and forehead, pores and oily skin.


Here you see the consistency of the product well, and the "illuminating" effect it gives. It is by no means a full coverage BB cream, unlike those you see in Asia, but I like the effect none the less. It looks natural, blends easily and is a light to medium buildiable coverage.


I applied two layers of the BB cream, each time not using anything more than a pea-sized amount. I applied it with a damp Beauty Blender sponge (magical foundation tool!), no powder and the effect is that which you see above. It sort of has a blurring effect to it, it has diffused much of my redness and my pores. Nowhere near enough coverage to completely cover it all, but with a product like this, I truly don't mind that. This picture was taken fairly up close with a flash and as you can see the SPF 30 in the product does not give any flashback at all, which I am happy about. It wears comfortably, but on oily skin you definitely need to powder it and for the summertime I will most likely be using a base underneath to optimize wear-time. 

If you are looking for foundation with sun-protection and don't need full coverage, I'd say this is a very good option, especially considering the price. The brand does pretty much only cater to lighter skin-tones though, but if you can find your colour, I'd definitely advise giving this a go for summer!


Catrice Camouflage Cream, 010 Ivory (€2.99).
A good concealer is a must for any make-up using gal, and many of us spend years on finding the perfect concealer. And even then that might be two at the same time, one for the face (blemishes, discolouration, etc) and for under the eyes.


This concealer comes in a pot which looks (again) very high-end. The pot is plastic with a screw-on lid. The concealer itself is a light beige with a yellow-y undertone. And dear readers... I'm sold on this baby! It's just under €3 and it's amazing. For both facial concealing but also for under my eyes!

Amazing concealing! Also my giant, curling iron accident scar!
As you can see above, we're talking some heavy duty concealing, which is awesome for the amount of money you spend on it!


The concealer applied under my eyes, applied with my finger and blended in with my Beauty Blender. If blended in well it does not sit in the fine lines around my eyes and it does need to be powdered, but I am in love! If you are looking for a heavy duty concealer for a good price, this is your stop! (If they have your colour, there are only 3.)


Catrice Prime and Fine Eyeshadow Base, (€3.99)
If I wear makeup, I wear eyeshadow. If I wear eyeshadow, I wear a shadow base. Which I why I found this an interesting product. I am always game for a cheaper option, as long as it lives up to what I am used to. 


The eyeshadow base is a thick, flesh coloured cream. It is a bit thicker than I'd like, which makes it a bit harder to distribute over the lid, but it does dry to a very matte, smooth finish. Completely different than my TFSI(Too Faced Shadow Insurance), but I like it. It really works, keeps my shadow from creasing and even provides a bit of coverage for those days when you just wanna keep it simple. It does need to be topped off with a powder, I think, but it might very well be able to replace my TFSI.


If you scroll up, you can see that I have some purple-ish hue on my lids and as you see in the picture above the primer is enough to cancel that out. On the above picture it IS topped with wash of skintoned eyeshadow, but not enough to provide any coverage on it's own, so the effect here is truly just the base. If you have dry lids and don't have a problem with creasing eyeshadow, you're a lucky SOB. If you have oily lids like myself and need something to help your eyeshadow stay in place (and show up better and blend better) this at least something to try out!


Wearing the three above mentioned products and a light dusting of MAC Studio Fix powder in NW 20.


The rest of my face done.
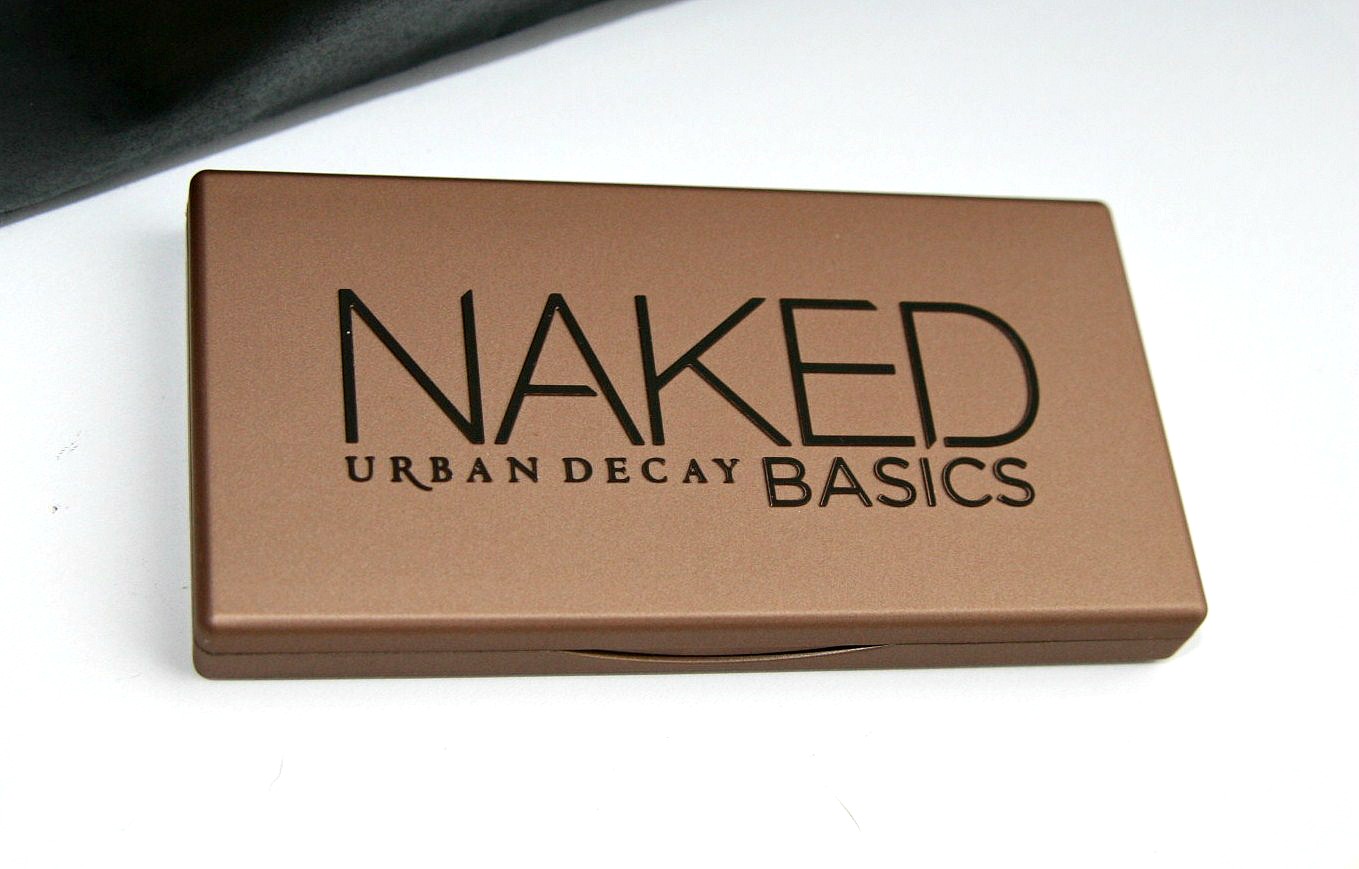
  • Brows: Faint from the Urban Decay Naked Basics Palette and Hema Eyebrow Gel in Brown
  • Bronzer: The Body Shop Honey Bronze Bronzing Powder in 3
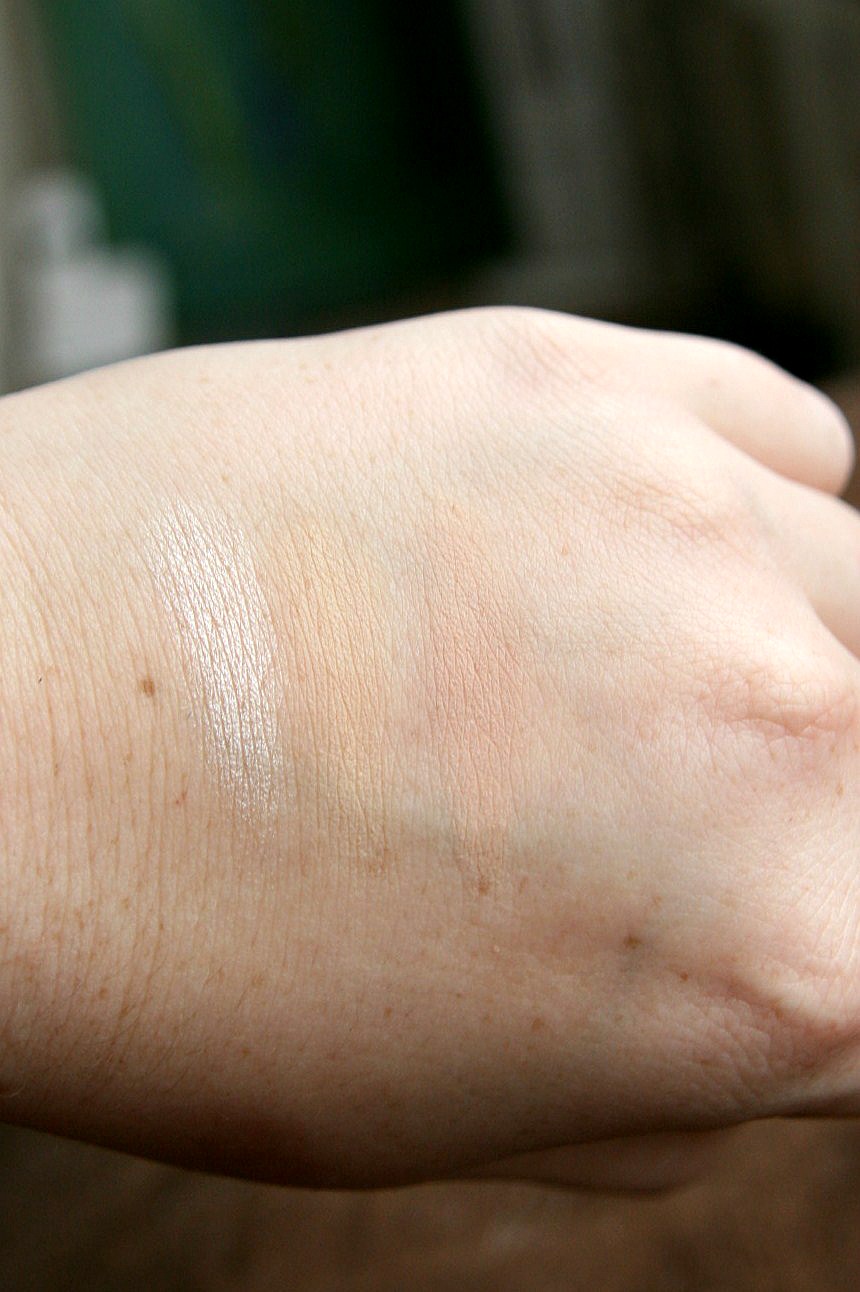
  • Blush: Hema Illuminating Blush in 6
  • Highlighter: Catrice Prime and Fine Highlighting Powder in 010 Fairy Dust. (Wearing this on my cheekbones, inner corner of the eye and browbone.)
  • Lips: Elizabeth Arden 8 Hour Cream.
All in all I am VERY pleased with all the products, but if I was to truly recommend one, that would be the concealer. It rivals (and beats) many high end products, and only costs a fraction of those.


Bonus picture! Sometimes it's hard to take pictures for your blog when you have curious monkeys like this one running around. This is Diego, a 3 year old Maine Coon. 


Thank you for reading! Got any recommendations, comments or questions? Let me know below.

Untill next time!

xxx

Wednesday, March 13, 2013

Tutorial: Urban Decay Naked Basics Palette

As promised, I made a look using the Naked Basics Palette and its versatility. Let's get crack-a-lackin'!

I started by moisturizing my face and lips. My moisturizer of choice is the Olaz/Olay Essentials Beauty Fluid Sensitive. It's completely safe for sensitive skin and contains no perfume. To prepare my lips I used my usual Elizabeth Arden 8 Hour Cream. After having let my moisturizer sink in I mixed a pump of MAC Prep+Prime Skin Base with a pump of Essence My Base Illuminating Make-Up Base. This provides both longevity and a nice glow to my skin.


I then applied a 50/50 mix of Max Factor Facefinity All-Day Flawless 3 in 1 Foundation in the colours Light Ivory 40 and Nude 47 with a damp Beauty Blender sponge. To conceal under my eyes I used Maybelline Super Stay Concealer in the colour Light 2 and layered ontop of that I used the Maybelline Dream Lumi Touch Highlighting Concealer in 01 Ivory. For the (more than a) few blemishes on my face I used MAC Studio Sculpt Concealer in NW15, I also used this under my brows. I used my Beauty Blender for the concealing as well.

For my eyebrows I used a Catrice Eyebrow Stylist but the colour has rubbed off. It's a dark, warm brown. To set the pencil I used Faint from the Urban Decay Naked Palette to define the ends of my brow and Naked 2 in the front bit of my brows. I set it with Hema Eye Brow Gel in Brown


To start off the eyeshadow I primed my lid with Too Faced Shadow Insurance, as always. I then took a large, fluffy paddleshaped brush and applied Foxy to my browbone and crease. I then used the same brush to apply Walk of Shame all over the moving eyelid.


Next I applied Naked 2 all over my crease with a fluffy, tapered blending brush and underneath my eye with a pencil brush.


I then applied Faint to the crease with a pencil brush for some more definition and in the outer corner of my eye, both to the lower and upper lid.


Then I took a fairly large angled liner brush and applied Crave to 3/4's of my upper lash line. No wing, no fancy tricks. With my hooded lids I often prefer not to put a wing on my liner as it tends to just get lost and/or crooked anyway. I then applied the shade Venus to my inner corner and also lightly on the very arch of my brow.


Curl them lashes and apply a generous coat of your mascara of choice. I used a Tweezerman Lash Curler and Catrice Lashes to Kill Waterproof Volume Mascara.


Moving on to the cheeks! To fake having cheekbones I applied a medium taupe (eyeshadow) powder by Inglot with a domed blush brush to the "hollows" of my cheeks. Excuse the "" but let's be honest, my cheeks are everything but hollow! To warm up my face a bit I topped it off with The Body Shop Honey Bronze Bronzing Powder in the shade 02. I also applied a little of the bronzer along my jawline and at my hairline at the temples.


For a healthy glow to my cheeks I used a Hema Limited Edition Blusher. They are no longer sold and it only says 06 on the back of the packaging. It's a true coral with a gold shimmer. On my cheekbones I applied the Catrice Prime and fine Highlighting Powder. Both of these products contain a very subtle shimmer that pretty much only shows in strong (flash) light or direct daylight, but they do provide a very healthy looking glow that I like.


On my lips I applied Rimmel Lasting Finish by Kate Lipstick in the shade 03. It's a brown-y pink nude, that wears very well but can easily look a little  brown, so I always blend it in a little with my finger. With this look you can pretty much throw on any colour lip, as long as it doesn't clash too much with your blush. (Which you can always just adapt anyway.)


As I wanted to make it a point in this tutorial to show what this palette is good for, I decided to do a very subtle "day-time" look first. For example one you would wear to work or school. But what if you decide to go out for dinner/drinks/concert/anything your long day? Well! Follow me, if you please.


To jazz the look up a little you will need only a few extra things. Urban Decay 24/7 Glide-On Waterproof Eye Pencil in the colour Demolition, an eyeshadow paddle brush, a fluffy, tapered blending brush, a stiff dome brush and the Urban Decay Naked Basics Palette. These are all things that would be easy to bring along to either school or work in a small make-up bag.


First I applied Naked 2 to my entire eyelid and into the crease using the paddle brush. I then picked up a generous amount of Faint with my stiff dome brush and applied this to 2/3's of my eyelid and blended it into the crease. I then lined my upper and lower waterline with the Demolition Eye Pencil and also blended it along 2/3's of my lower lash line, making sure it was nice and dark. 

To make sure everything on the lid was blended properly I took my tapered  blending brush and some Walk of Shame and blended along the crease. With my paddle brush I then applied Crave along the lash line and made sure to blend it upwards with every stroke. At the outher corner I applied it thicker and blended it further up for a smokey look.


And this is the finished result. A soft, smokey look, which is still able to carry a bright or dark lip. You can of course, if you feel comfortable doing so, make it a lot darker. I personally prefer a softer look usually as I just find it more flattering on my. And things tend to look very dark on my pale skin.


What do you think of this day/evening look? Did you find the tutorial useful? Any other thoughts? Let me know in the comments below!

Next post will most likely be my review of the UD Eye Pencil.

Thank you for reading and untill next time!

XXX

Tuesday, March 12, 2013

Review and Swatches: Urban Decay Naked Basics Palette.

If you follow beauty news, you're bound to have heard of this product. Personally I am becoming a bigger and bigger Urban Decay fan, something my wallet isn't too happy about!

Let's get started!

The palette was created as a companion to the Naked Palettes as neither of them have many matte shadows in them, and Urban Decay fanatics across the world had let the company know they were not too happy about that. I love the fact that UD listened to their followers and produced this baby!


About the product Urban Decay says:


"Begin ANY look with these six essential shadows. This palette of must-own shades (with four exclusives!) features both mattes and satins for lids, liner and crease." - taken directly from the packaging.

Alright, on to the actual review!


The packaging is exactly half the size of the other Naked Palettes, smaller than your average smart phone! It's a sort of metallic-y, suede-rubbery like texture which feels very soft to the touch, sort of a funny feeling really. The lettering is matte and embossed on the packaging. All in all a very classy and pretty packaging, I like it! Very much like the product itself, timeless and gooorgeous.

L-R: Venus, Foxy, Walk of Shame (W.O.S), Naked 2, Faint, Crave.

The inside of the packaging has a beige-y mother-of-peal sheen and as we are used to from UD each shadow has its name written underneath. (Click the picture for a fullsize version!)


L-R: Venus, Foxy. Walk of Shame.
Venus is a shimmery creamy-white. It's more than just as a satin, as the packaging would have us believe. It's very pigmented and great as an inner-corner highlight. Also doable for brow-highlight, but only on very pale skin tones. (Exclusive to this palette.)

Foxy is a matte, yellow beige. It's very buttery smooth and has amazing colour payoff. It's very pigmented and makes for a great allover lid base or colour.(This colour is available as a single from UD and also is in the Naked 2 Palette.)

Walk of Shame (W.O.S) is a pink-toned beige, with once again great payoff. To me it's a little darker than my skintone and therefore not quite a highlight colour, might be on medium skin though! It's completely matte and very smooth, as we expect from UD. (Is only available for the UD Build-your-own palettes.)

L-R: Naked 2, Faint, Crave.
Naked 2 is a matte, medium taupe (brown-grey) colour, which is a great crease colour on my skin-tone. It's very smooth and blends wonderfully on the lid. The neutral tone in this means it looks amazing on all skin-tones, be they warm or cool. (Exclusive to this palette.)

Faint is a medium to dark, slightly warm-toned, brown. It's again completely matte and blends like a dream thanks to the Urban Decay softness. It's great as a crease colour or maybe for extra definition in the outer corner of the eye.(Exlusive to this palette)

Crave is a dark black. You'd think "Black is black!" but when it comes to eyeshadows, it's not. This is very pigmented, but there's something in it that's not quite a proper, deep black. It sort of has a brown tinge to it, like there's a smudge of dark, espresso brown mixed in to it. This blends amazingly and can therefore be used for anything you'd use a black shadow for. Personally I use it as a soft eyeliner with an angled brush and maybe for a touch more definition in the outer corner. (Exclusive to this palette)


Pros:

  • All the shadows have great pigmentation.
  • Urban Decay has made their matte shadows much easier to blend, which makes them much more pleasant to use. They truly half the time I need to spend blending them!
  • If you're a lover of matte neutrals, this is surely a one-stop-shop.
  • The packaging is great for travelling and easy to keep clean.
  • Cruelty free, the whole brand is.


Cons:

  • Price-point could be an issue for some. I personally did take some persuading to lay down the €25.95 it cost, but I sure am happy I did.
  • Availability. Only sold at Sephora (in Holland at least) and in online, overseas, stores.
  • Not really worth it if you can't live without shimmery shadows.

Conclusion: I'm in love. I've really been on a matte, brown, smokey-eye kick lately and this palette is PERFECT for it. (I blame the always awesome Gemma Teller Morrow from Sons of Anarchy.) This is perfect for travel, as you can create a soft day-time look and jazz it up in the evening with the darker colours. For my friends out-there who love mattes and maybe a 50's inspired pin-up type of look, this is the place to go. Throw on a red lip and it's ON! 


Share your thoughts on this palette, let me know what you think about it, if you have it, anything!

Thank you for reading and untill next time!

XXX

Saturday, March 9, 2013

Beauty Haul!


I did a wee bit of shopping the other day when my husband and I took a trip to Utrecht and I thought I'd share it with the kind people who read my blog. Most of the stuff was bought at Sephora except the rose water which I bought at Erica, which is sort of a natural health/beauty store. Anyway, let's kick off!

Erica Rose Water 500ml (€4.95). This contains no alcohol, no perfume and no parabens, so perfect for my sensitive skin. I use this as a toner, after having cleansed my face. It's for dry and sensitive skin, and this time of year my skin is both. Most regular toners make my skin feel very dry and some even make it burn a little so this is why I opt for something this natural.


Sephora Waterproof Eye Makeup Remover 125ml (€7.00, second one was half off). This also contains no alcohol, perfume or parabens. I always wear waterproof mascara so I need a good remover to make sure I get it all off. These are usually this kind, two liquids, that you then shake to mix. Other brands I have tried of this tend to leave a sort of oily layer on my skin, this one doesn't, which gives me all the more reason to like it. It removes all my eye makeup very quickly, without having to rub the very sensitive and thin skin around the eye area.


Too Faced Shadow Insurance 11g (€19.80). My one and only holy grail product, I refuse to do my eye-shadow without it and my old one was almost gone. This is the best eye-shadow primer out there, if you ask me and I've been using it for three years. One tube is 11g and lasts me about 16-18 months. In the second photo you see a small dot of product next to the bottle and this is what I need to do both my eyes and eyebrows. You only need a tiny amount every time which is why it lasts for so long. 


Urban Decay 24/7 Glide-On Waterproof Eye Pencil (€19.10). This renowned eye pencil I just had to get. They are known for their softness, longevity, intense pigment and insane colour range. I bought the colour Demolition, which is a deep, chocolate brown. These set very quickly on the skin, which gives them the well-known longevity and only leaves you a few seconds to blend/smudge them should you want to. It also means they are perfect for wearing on the waterline. Review and tutorial will follow soon!


Urban Decay Naked Basics Palette (€25.95). This beautiful little palette is something Urban Decay produced after having received many complaints about the Naked 1 and 2 palettes. They have very little matte shadows in them and this baby contains 5 matte shadows and a single iridescent highlighter. 4 of the shadows are completely exclusive, which means they have never been seen in an Urban Decay product before. Review and tutorial will follow along with the Glide-On Pencil!


Have you done any beauty/makeup shopping recently? What did you get? Let me know!

Thank you for reading and untill next time!
XXX

Wednesday, February 27, 2013

Dutch Glossybox Febuary 2013


Glossybox is a term that over the last two years has exploded in beauty land. The concept is very straight forward; You pay €14.95 (incl. shipping) for a one month subscription, which is a single box. There are also other subscriptions for 3 months, 6 months or 12 months. The box contains 5 travelsized products (usually at least 1 fullsized one) which in value will always exceed the cost of the box. It's an amazing way of trying out new products and it's a nice little surprise for yourself at the end of the month! For more information about the concept, check the Glossybox website.


Anyway, after that short explanation let us move on to the actual box! This months Glossybox (The Dutch one) was themed "Go inside the Beautylab!" which was packed with experimental products, which I found nice. Beautyproducts wouldn't be where they are today without science, so I like the mix of the two in this box!

The box came with a coupon for a free Albelli photobook worth €13.95, you'd still have to pay shipping.
A €5 coupon for the online shop of Dr. Van der Hoog if you spend more than €15 and a new edition of GLOSSYmag, the mini Glossybox magazine.


Indola Wonder Treatment, 100 ml fullsize product (€14.95)
This is basically just a very fancy leave in conditioner. It's a two phase product which needs a good shake before use. It promises the following on the bottle:

  • Instant shine and smoothness
  • Incredible detangling
  • Repair and nourishment
  • Revitalised bounce and vitality
  • UV & colour protection formula
  • Static and frizz control
  • Reduced split ends
  • Easy blow dry
  • Active moisture balance
  • Feather-light formula
So it promises a whole lot, some of which is just hot air, really. If you're just looking for a light formula leave in conditioner it's good, especially with hair like mine which gets oily easily, but it is by no means a wonder product. It does reduce frizz and adds some shine, but not in the amount you'd expect from reading the packaging. The scent is a very sweet, almost heavy, vanilla which luckily doesn't linger. I don't appreciate this kind of scents in my products, especially hair products as it then wafts into your face all the time.


Biotherm Biomains, 20 ml sample. (100 ml retails for €25, so this tube is about €5 worth of product.)
A very rich hand and nail cream, which dries fairly quickly on the skin and gives instant relief from dryness and itching. If it wasn't for the steep price-tag  this would probably become a go-to product for me. The size of the tube means it went straight into my handbag, and will be staying there over the coming weekend as I will be travelling and air-co on planes always messes up my skin.


Mario Badescu Silver Powder,14 ml sample. (29 ml retails for €14 so this jar is €7 worth of product.)
This is one of those freaky science-y products that you always read about on other blogs and really want to try out, but don't wanna pay the cash for something you might not use. It promises to fight stubborn blackheads and visible pores. I don't know to what extent it did this, but my skin was looking better after use on my T-zone, more matte and such. Sort of on the fence about this, need to test it some more!


Dr. Van der Hoog Hydro Active Mask, 50 ml fullsize (€9.10)
A hydrating, exfoliating and regenerating mask. This brand is very popular in the Netherlands and I am personally a big fan of all their masks. This packaging is great, it comes with an application brush which you can clean just using warm water after you've turned the head to avoid getting water in your product. The product itself is a thin, milky white gel which feels cooling on the skin. I use this on my cheeks and the sides of my forehead as these get very dry in the winter months. It left my skin feeling hydrated and looking radiant. I say it's a keeper!


Bell "Air Flow Lotus Effect" Nail Polish 703,  10 g fullsize (€3.50)
This polish promises strong staying power thanks to a high concentration of polymer. The label also claims that the polish lets air through to the nail and that the polish therefore would be less damaging. I wore this polish for 15 hours without a topcoat until I noticed the first tip wear. at 36 hours it had already chipped, so I don't know about that staying power or the "air flow". Can't stay I'm impressed. The colour is a light, pastel lavender which is cute for spring and all, but the formula leaves a few things to be desired. After 3 coats it still looked patchy, took forever to dry without a fast drying topcoat and wasn't very shiny on it's own. Nope, this hyped up product won't become a staple in my polish stash.


Yours truly wearing the mask in my cheeks and the silver powder on my T-zone!

All in all, a good €15 spent! I love the concept of the Glossybox and it would also make for a great present for any beautyaddicts in your life!

Have you tried Glossybox yet or any other Beauty Box? Do you want to? Have an opinion on the products that I tested in this months box? Let me know in the comments below!

Thank you for reading!

xxx